After building the base of the bear heads I then had to figure out how to cover them, and what materials to use.
I looked at some natural materials first, as a lot of the traditional costumes that I had looked at in research used things like fur belts, bones/ skulls, wood etc.
I started with what I had nearby on the farm, which was straw and a lot of willow. I backed these onto cardboard, to see what it would be like attaching these types of materials to the bear. The straw didn't stick well at all, and I kind of had to just cover it in glue in order for it all to stay on the cardboard and not just fall off once lifted up. The willow was the most time consuming, and using hot glue to stick each twig down was monotonous- I couldn't imagine applying it to a large costume!
I then experimented with a different texture by manipulating strips of ModRock on a piece of cardboard, and this dried very quickly and was easy to shape to begin with- which would allow some flexibility and improvisation if I were to use it to cover the head.


As these didn't really look like much on their own, I painted them black to get a better idea of what they would look like if used on the bear.
The ModRock although easy to work with initially was the most difficult to paint, it was hard to get an even layer and the spray paint couldn't reach inside all the folds, leaving grey patchy areas. However, this could be easily fixed by going in and painting with acrylic and a brush to get into all the nooks and crannies. All in all it's not a very bear like texture- it just looks like ruched up fabric and it's not a natural looking so it doesn't translate as a traditional costume type material. I would use this if I was making a rhino, or an old person. Something wrinkly.

The straw is probably my preferred texture out of the three. Sprayed black I think it does read as messy, matted fur- whilst also being a natural material. I think used all over the bear head it would work- however I would be nervous about the hay remaining on the head as it is such a brittle material. If I were to go ahead and use it I would again experiment on this cardboard with spray mount/ varnish to see if there was a way to keep all the hay in place and making it stronger.

I like the look of the sticks, but sticking (ha!) them down put me off using them. It was difficult enough attaching them on a flat piece of cardboard, I think I would struggle attaching them to a 3d object. Also, sprayed black you lose the actual twig/branch look and it just looks like corrugated cardboard to me!

I also wanted to experiment with fabric, so I cut a swatch off an old jumper and sprayed that black. I think fabric is a safe choice as it's relatively easy to shape around a 3d object, and depending on what I use I can emphasise different parts of the bear by using different texture/ weights of fabric. I can also paint over and dye fabrics to create the colour I want, and by painting over fabric I think it will create a really interesting look.

With this in mind I scoured local charity shops for some bear like fabric. As it is April, most of the winter clothes had gone and were replaced by floaty, floral numbers. Luckily, in the back of Emmaus charity shop I found these perfect bear fur treasures:
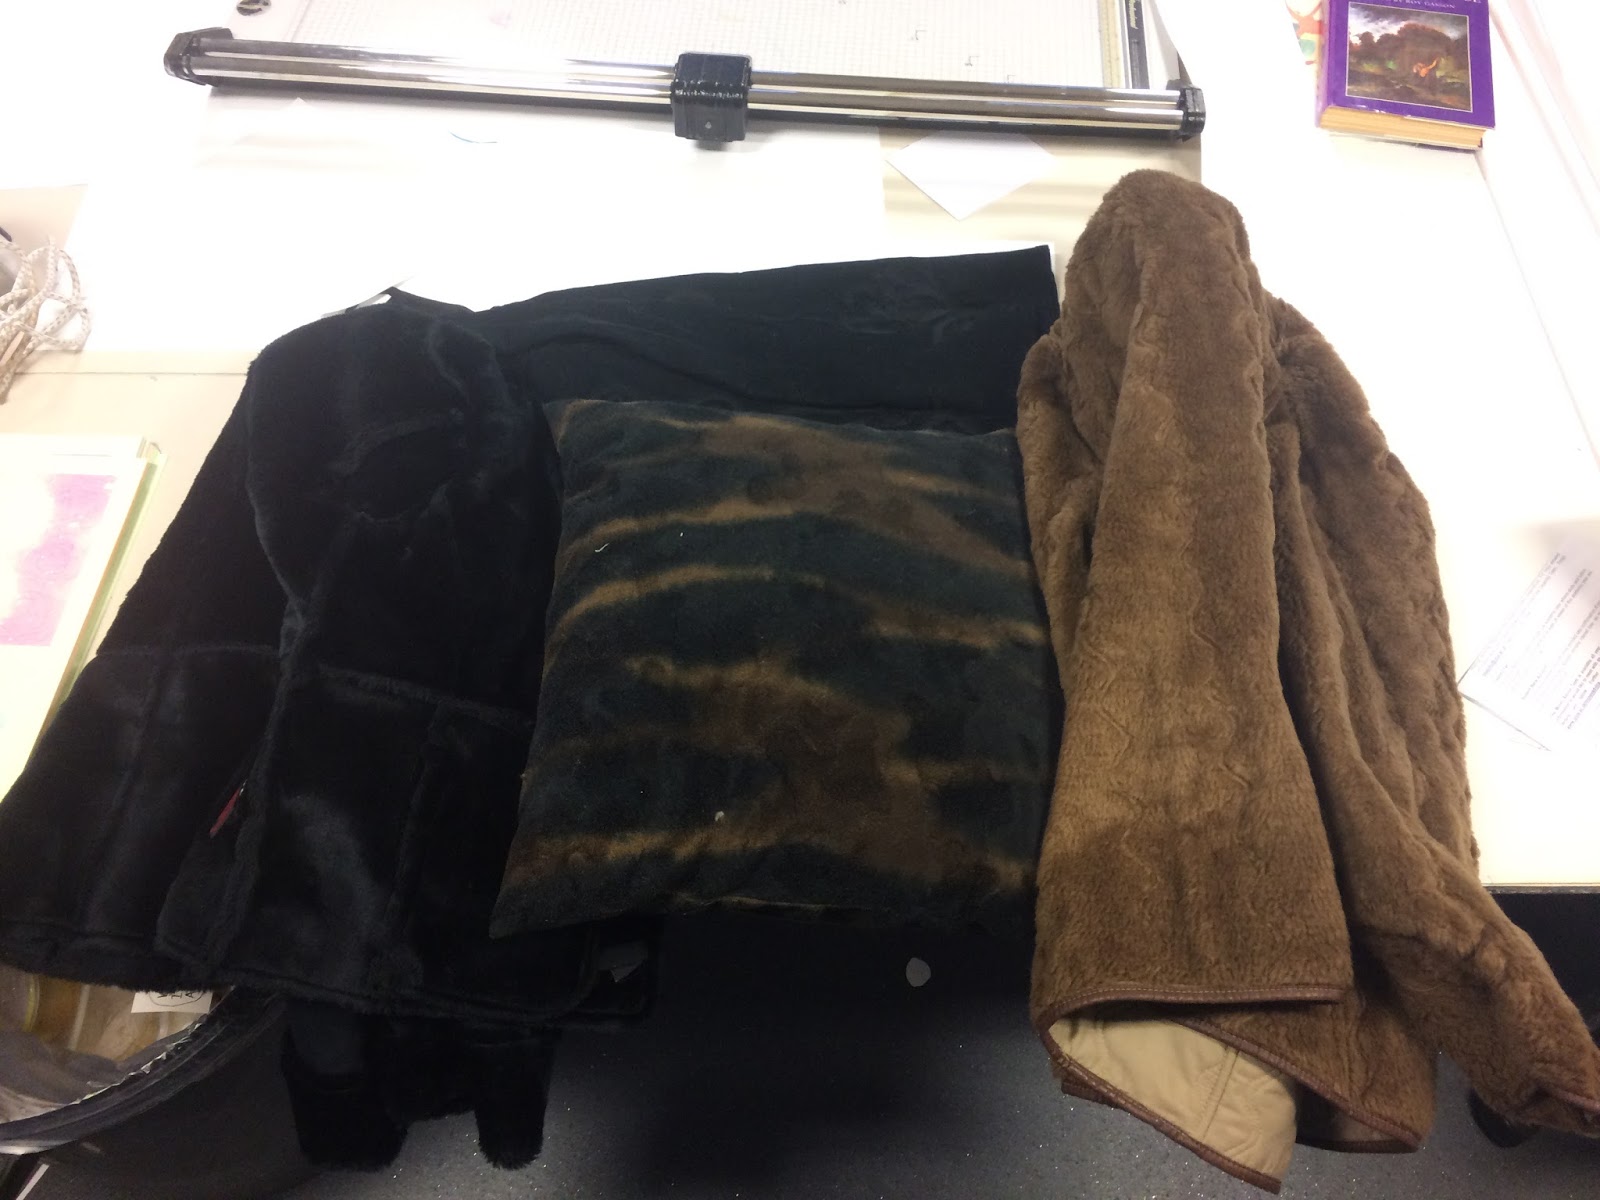
A kind of furry/ felt/ fleece cushion with a brown and black mottled pattern which I think is supposed to be some kind of animal print? Half way between a tiger and.. something brown. Looking at photos of bears the fur on their muzzle/snout is shorter than the fur on their face and body, so this might be good for the bears nose.

The fabric above (but pictured below the cushion) is the inside of an old coat, as is the fur below. I think these are perfect for the bear head, although they do have some seams sewn into them which makes it a bit trickier.

As the general theme with making the bear so far, I'm going to have an idea of what I want it to look like but also improvise as I go along. I think you have to start making in order to find out what you like and what works!
Before I even start messing around with fabric I want to spray the bases of the bear head black. I choose the wire head to continue with, because out of the two heads I have made I think it will resemble my style of illustration more and also go with the printed fabric I have made for the body of the costume. The wire is also easier to alter as I go along if I need to change the shape of anything.

By looking at this photo of the partly spray painted bear (ran out of spray paint) I can easily see that the shape is not perfect. By putting the image in photoshop I can create an idea of how I want the shape of the bear to look, and by adding some more at the back I think it makes it look more realistic.


Using photoshop I can also add illustrative details to show how I will make it look more bear like and cohesive with my illustration style. Before I wanted to add anything more to the bear I sprayed the entire thing black (when I got a new can of spray paint).
Again, I documented covering the bear head using timelapse video.


Once the head had dried I cut up the coats and other pieces I bought so they were flat pieces of fabric to work with. I started by laying out the black fur on the bear head to see what fit where, and try to use the pieces of coat symmetrically to cover the head. The style of coat is a kind of patchwork itself, so the inside of it has these kind of obvious seams. However, I think this works in my favour as I can put the fabric together to look like patchwork to cover the bear head and this can reflect the patchwork pieces printed for the body of the bear. I also want the head to look handcrafted, it doesn't have to be perfect or realistic, as I also want it to resemble the old pagan/folk costume that I have researched.
Also although previously I wanted to widen the shape of the head, looking at how much fabric I have I think I will leave it as it is, I think this shape makes it look a bit more peculiar and handmade- and also there will be a ruff around his neck which will cover it anyway.


Before I attached the fabric to the bear I decided to paint the snout, and before I painted the snout I used ModRock to add nostrils and define the nose more. I then used greys and blacks to add detail to the snout and to make it look like the fur would be shorter on the muzzle compared to the black fur on the head. I did this all to help emphasise that it is a bear and not horse. The eyes I just cut out of paper and taped on temporarily to see whereabouts they would go on the bear.


Looking at the bear head and these pictures I really don't like the look of it's bottom jaw/ lip, I think its too big and comes too close to the front of his top jaw/ nose. I decided to chop it off to smooth it out and make it smaller and more bear like!

I also noticed that the jaw went up to high on one side, making it look like the bear is smiling- which is definitely not the look I'm going for! I decided to fill in the gaps and reform the mouth area using PVA and tissue pulp, which is easy to mould into shape, and then covered this new jaw area in papier-mache. At this time when I was still editing the shape of the bear I also cut out eye-holes so whoever's wearing the head can actually see.


I also went on to reshape the back of the head to create less off a harsh angle and more of a slope, and also recovered it in Mod Rock around the new jaw, re-sprayed it black and also re-painted the nose grey and black.


To mimic the patchwork costume the fur fabric on the head will also have a pieced together effect. I hot glued the fabric to the head and to emphasise the seams and communicate that homemade, folk costume look I went over the seams with wool- to really thicken them and to make them stand out. I want this costume head to LOOK handmade and like it is used in some kind of pagan forest festival, so I'm happy for it to look very rustic, but not sloppy and unprofessional.


Again to communicate the hand crafted effect of the costume which would emphasise the forest, folky theme, I hemmed around the fabric I had cut out of the eyes with the seams on the front, to show the stitches and to make it look 'patchworked' together.
After this was complete I resprayed the bottom of the head black around the edges- and it was ready for the fabric to be attached!


No comments:
Post a Comment